When you complete an appointment, you can quickly post the procedures attached to the appointment to Ledger and Patient Chart. Also, for a continuing care (recare or recall) appointment, Dentrix Enterprise makes posting completed work, updating the patient's continuing care, and scheduling the patient's next visit simple. All you have to do is mark the appointment as "Complete," and then let Dentrix Enterprise guide you the rest of the way.
Note: Completing appointments requires the "Appointments, Set Complete" security right.
To post appointment procedures
In Appointment Book, do one of the following:
Select an appointment, and then click the Set Complete button ![]() on the toolbar.
on the toolbar.
Select an appointment, expand the File menu, and then click Post/Set Complete.
Right-click an appointment, and then click Post/Set Complete.
If applicable, do one of the following:
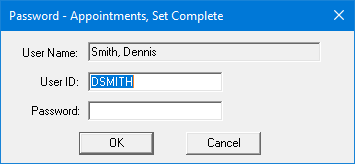
If the Password - Appointments, Set Complete dialog box appears, user verification has been assigned to the "Appointments, Set Complete" task. Do one of the following:
If your user account has been granted the "Appointments, Set Complete" security right, enter your credentials in the User ID and Password boxes, and then click OK.
If your user account has not been granted the "Appointments, Set Complete" security right, have a user with permission temporarily override this restriction so you can complete the appointment. The overriding user enters his or her credentials in the User ID and Password boxes and then clicks OK.
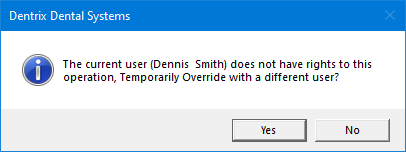
If a message appears, informing you that you do not have rights to this operation, your user account has not been granted the "Appointments, Set Complete" security right. To have a user with permission temporarily override this restriction so you can complete the appointment, do the following:
On the message, click Yes.
In the Password - Appointments, Set Complete dialog box, the overriding user enters his or her credentials in the User ID and Password boxes and then clicks OK.

Note: If the appointment contains a procedure (associated directly or from a linked treatment plan) that pertains to a procedure code that has been inactivated, a message appears, stating that inactive procedures are attached and must be removed before you can set the appointment complete.
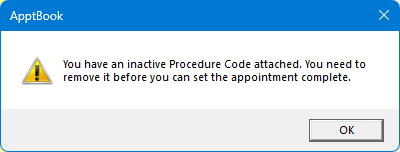
Click OK to dismiss the message.
You are returned to the Set Appointment Procedures Complete dialog box. The inactive procedures are indicated with an "(i)," and the Set Complete button is not available.
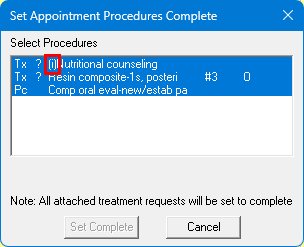
Close the dialog box by clicking Cancel or the X.
Remove the inactive procedures from the appointment.
Attempt to set the appointment complete again.
The Set Appointment Procedures Complete dialog box appears.
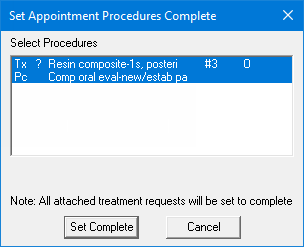
All procedures that are attached to the appointment are selected. Deselect procedures as needed:
If a procedure has not been completed during this visit, deselect that procedure.
If a procedure was added to the appointment by clicking Misc and requires additional treatment information (such as a tooth number or surface), that procedure cannot be set complete, so deselect it. You must post it to the patient's Ledger separately, specifying the applicable treatment areas.
Note: If treatment that was not attached to the appointment was performed during this visit, you can post the completed procedures in Patient Chart or Ledger.
Click Set Complete.
Dentrix Enterprise posts the applicable procedures to Patient Chart and Ledger, and the appointment in Appointment Book becomes gray to indicate that the appointment has been completed.
If a completed procedure is associated with a continuing care type, a message appears and asks if you want to schedule the patient's next appointment.
Note: If you complete an appointment for a procedure that is associated with continuing care, whether or not the applicable continuing care type is attached to the appointment, that continuing care type is added to the patient's record automatically using the default settings. However, Dentrix Enterprise does not prompt you to schedule the next appointment for that continuing care type.
Click Yes.
Appointment Book jumps ahead, relative to today's date, by the interval specified for Continuing Care type that is attached to the completed appointment, and the New Appointment Information dialog box appears.
Appointment information from the completed appointment is used for the new appointment, but you can make changes as needed.
Click Pin Board to put the appointment on the Pinboard, locate an open time slot that works for the patient, and then drag the appointment to that time slot.
A confirmation message appears.
Click Yes.